Generate a Single Confirmation at a Time
You can generate a confirmation for all the bookings in a reservation, or just for a selected booking in a reservation. In the as-delivered implementation of EMS, when you generate a confirmation for a reservation or a booking, the Confirmation dialog opens. This dialog has the same tabs as the Confirmation Settings dialog. It also contains options for generating a print preview of the confirmation and for manually printing or emailing an EMS-generated confirmation.
See Also:
- Your Confirmation Settings determine the information included in a confirmation. See Also: Specify Confirmation Settings.
- To generate multiple confirmations in a single step, see also: Generating Multiple Confirmations.
- You can Memorize your confirmation settings for the next time you generate the confirmation. See Also: Working with Saved Reports.
Manually Generate One Confirmation at a Time
- Open a reservation.
- In the left pane of the Navigator, select the reservation for which you are generating the confirmation.
- You can also associate the confirmation with a specific booking within the reservation by selecting it in the Bookings (lower right) pane.
- Do one of the following:
- If you are generating a confirmation for a reservation, then open the Reservation Summary tab or Properties tab in the upper right pane of the Navigator, and then click Confirmation.
- If you are generating a confirmation for a selected booking, then open the Booking Summary tab in the upper right pane of the Navigator, and then click Confirmation.
- The Confirmation dialog opens. It has the same tabs as the Confirmation Settings dialog with one exception, the Date Range tab. On the Date Range tab, you can limit the confirmation to specific bookings and/or specific booking times. When the dialog first opens, the Confirmation Setup is set to (user-specified).
- Review the selections and optionally, make modifications.
- If you Use Specific Times, then you must also click Options and indicate how the confirmation is to be limited: to bookings that start within the range or to bookings that occur within the time range.
- From the Setup field, you can select a memorized confirmation. If you select a memorized confirmation, then the only changes that you can make are to the dates and/or times on the Date Range tab.
- Generate a printed confirmation or email one:
- For a printed confirmation, enter the number Copies to Print, and click Print. A Print dialog opens in which you can specify information, such as the printer to use and the page range. Click Print to manually generate the printed confirmation.
Before you print the confirmation, you can view a Print Preview, from which you can email the confirmation, export the confirmation to .pdf, and print the confirmation.
- For an emailed confirmation, click Email. See Sending Email from EMS. Below is an example of the SMTP email window.
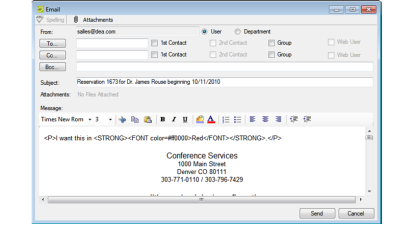
SMTP Email Window for a Confirmation
- For a printed confirmation, enter the number Copies to Print, and click Print. A Print dialog opens in which you can specify information, such as the printer to use and the page range. Click Print to manually generate the printed confirmation.
Automatically Generate a Confirmation
If you want to always automatically generate a printed or emailed confirmation based on your confirmation settings, then you must edit the Confirmation setting on the General tab of the Navigator Options dialog.
- Open a reservation.
- In the upper corner of the Navigator window, click Settings > Options. The Navigator Options dialog opens.
- Under Confirmation, select one of the following:
- Email – Always automatically generate an emailed confirmation based on your confirmation settings.
- Print – Always automatically generate a printed confirmation based on your confirmation settings.
- Click OK. The next time you initiate a Confirmation in the Navigator, EMS will Email or Print your confirmation based on your settings above.