Install or Upgrade EMS SOAP API Web Service
Before beginning the installation process, do the following:
-
Install or upgrade your EMS databases as outlined in the EMS Desktop Client Installation Instructions.
-
Manually uninstall any previous versions of the EMS API Web Service on your web server.
-
Verify that the prerequisite software is installed.
-
Download EMSAPI.msi onto the web server.
-
Run EMSAPI.msi.
The Welcome page opens.
-
Click Next to begin the installation process.
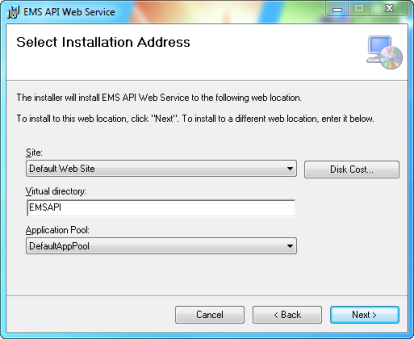
The Select Installation Address page opens.
-
Select the Site, Virtual Directory, and Application Pool.
We recommend that you keep the default settings. The installation process will create a Physical and Virtual directory on your web server named “EMSAPI” (or whatever value you entered in the Virtual Directory field.)
The EMS API should not be installed in the same Virtual Directory as other EMS web-based products.
-
Click Next to begin the installation process.
-
The Confirm Installation page opens.
-
Click Next.
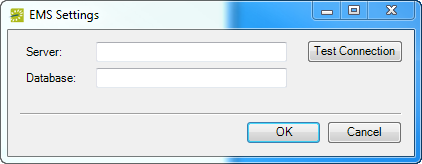
The EMS Settings page opens.
-
Enter your EMS SQL Server Name.
-
Enter your EMS Database:
-
EMS Professional customers – enter “EMSData”
-
EMS Workplace, EMS Campus, EMS Enterprise, EMS Legal, and EMS District customers—typically named “EMS”
-
-
Click OK.
The Installation Complete page opens.
-
Click Close.